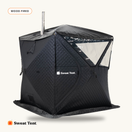

Sweat Tent XL — Owner's Guide
XL
Wood-Fired Outdoor Sauna
Fire & heat safety
- Surfaces get hot. The stove, chimney, rocks, and poles can burn on contact. Use the included glove; never let children touch the unit.
- Outdoor use only. Never use indoors or in any enclosed, unventilated space. Keep the bottom intake vent open at all times.
- Keep 3 ft of clearance from any structure, object, or combustible material. Clear the area of brush and debris; don't set up under low branches.
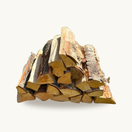
- Burn hardwood only — preferably white birch. Any other fuel is unsafe and voids the warranty.
- Never leave the sauna unattended while it's lit, and never sleep inside while the stove is running.
- Don't use under the influence of alcohol, drugs, or other intoxicants. Remove all jewelry before use.
Watch the setup
The XL uses a pole frame — watch the full setup before your first burn.
How to set up your Sweat Tent XLWatch on YouTube ↗What's in the box
Lay everything out and confirm all 13 items before you start. Missing or damaged parts? Email contact@sweattent.com.
Initial burn (season the stove)
Your stove ships fresh off the line. Before its first use inside the tent, run an initial burn outside: light two logs and let them burn completely until they burn out. This completes the initial burn and cures the paint to the steel. The stove will pop, crackle, and change color — that's normal.
- Empty the stove and set it on a non-combustible surface outdoors, legs out.
- Assemble & attach the chimney — interlock the pieces until they lock, then press onto the stove.
- Open the control vent fully. Add two logs (hardwood, preferably white birch) and a fire starter if desired, then light.
- Let the two logs burn completely until they burn out — this completes the initial burn. Let the stove cool fully before handling.
Set up your tent
The XL is a pole-frame tent — slightly more assembly than the pop-up Large, but the same idea. Find a flat, clear 12 ft × 12 ft area on concrete, tile, dirt, grass, turf, ice (1 ft+ thick), or unvarnished wood — at least 3 ft from anything.
- Stake the four corners into the ground so the tent base is taut and square. On hard surfaces, weigh the corners with cinder blocks or sandbags instead of stakes.
- Lay the two T-poles across the top of the tent, holes on the T-connectors facing down.
- Insert the spring rods fully through each of the four sleeves on top of the tent and into the T-poles; match the T-pole ends together and push down. Slide the sleeve brace over each joint until the push-pin locks.
- Raise the walls — insert each upright pole into the hole on the bottom of the T-pole, lift, and secure it to the bottom of the tent with the attached pin. Repeat on the other side and tighten until taut.
- Anchor & cover. Weight the skirt, secure the ropes to the base pins, then install the roof cover and clip its corners to the spring rods with the Velcro loops.
- Lay the fire mat down first, then place the seasoned, fully-cooled stove on it — directly under the ceiling opening, door facing the tent door. Guide the chimney up through the roof collar. Bring in wood seating only (no metal).
Fire it up & sweat
- Open the vents. Keep the rectangular floor intake open at all times; slide the stove's control vent fully open.
- Light the fire with 2–3 split hardwood logs — preferably white birch — and a fire starter if desired. Keep the stove door closed except when adding wood.
- Reach temperature. Reaches 176–200°F in 20–30 minutes, and maintains 180°F+ even at outside temps as low as 10°F. Add a log or two to climb; more airflow burns hotter.
- Sweat it out. Pour water slowly over the rocks for steam, and stay in as long as you're comfortable — step out to cool down whenever you need to. Always use the glove on the stove door.
- Let the fire burn out naturally. Never move the stove until it's fully cooled. Dispose of ashes in a metal container with a lid.
A stove or chimney that glows red isn't dangerous, but it means you're over-firing. Restrict airflow and use no more than 4 split logs at a time to protect the steel.
Care & storage
After use
Let everything cool fully. Clean the stove and remove ashes periodically into a lidded metal container. Wipe down condensation and let the tent dry before packing.
Regularly
Brush creosote from the chimney to prevent chimney fires. Remove surface rust from the stove with a mildly abrasive sponge and white vinegar or rust remover.
Storage & weather
The tent can stay set up outdoors with the roof cover on through normal conditions — but it's still a tent. During high winds, heavy snow, severe storms, or other extreme weather, take it down to prevent damage. It's built to stay up for extended periods, but it isn't meant to withstand extreme weather indefinitely.
Troubleshooting
| Issue | Likely cause | Fix |
|---|---|---|
| Fire won't stay lit | Wet/green wood or too little air | Use dry hardwood (white birch burns cleanest); open the control vent and pull the ashtray out an inch; add a starter |
| Not getting hot enough | Too few logs / restricted airflow / cold day | Add 1–2 split logs, open both vents, keep the door closed |
| Smoke coming into the tent | Chimney not seated, cap obstructed, or wind downdraft | Confirm chimney sections are locked and the cap is clear; keep the floor intake open |
| Frame feels loose | Spring-rod braces or upright pins not fully locked | Re-seat each spring rod until the push-pin clicks; confirm every upright pole is pinned to the base |
| Water pooling / condensation | Normal — steam meets cold exterior | Ventilate, wipe down, dry fully before storage |
| Zipper sticking | Grit in the track | Clean the track; never force it (replacement zipper kits available) |
FAQ
How long does it take to heat up?
Reaches 176–200°F in 20–30 minutes, and maintains 180°F+ at outside temps as low as 10°F. Wood type and outside temperature affect the time; 3–4 pieces of split hardwood — preferably white birch — is usually enough.
What wood should I burn?
Use hardwood — preferably white birch — for the cleanest burn. Avoid softwoods and synthetic/processed logs, which create more creosote and can void the warranty.
How is the XL different from the Large?
The XL fits up to 10 people and uses a pole frame (T-poles + spring rods + upright poles) rather than the Large's pop-up walls. Setup takes a few more steps; everything else — stove, operation, care — is the same.
How do I keep it from blowing over?
Stake the four corners (or weigh them with blocks/sandbags on hard surfaces), weight the skirt, and use the ropes. In high winds or storms, take the tent down.
Can I leave it set up permanently?
It can stay up for extended periods with the roof cover on during normal conditions, but it's still a tent — take it down during high winds, heavy snow, or severe storms. It isn't meant to withstand extreme weather indefinitely.
Specifications
- Operating temperature
- 176–200°F (80–93°C)
- Time to temperature
- 20–30 min
- Capacity
- Up to 10
- Footprint
- 12 × 12 ft
- Frame
- Pole frame (T-poles + spring rods)
- Recommended fuel
- White birch hardwood
- Clearance required
- 3 ft
Before you sweat
This information is for general wellness only and is not medical advice. The Sweat Tent is not an FDA medical device and is not intended to diagnose, treat, cure, or prevent any disease. Always consult a licensed healthcare professional before sauna use.
Sauna therapy can be dangerous for some people. Do not use if you are pregnant, under 18, or under the influence of alcohol or drugs, or if you have cardiovascular problems, an impaired ability to sweat, heat insensitivity, or other conditions affected by heat. Listen to your body, hydrate, and step out to cool down whenever you need to. Stop immediately and seek care if you feel faint, dizzy, or unwell.