Your cart is empty
Continue shoppingShopping cart (0)
Frequently added
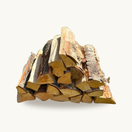
White Birch Firewood (1 Box)
$59.99
$79.99
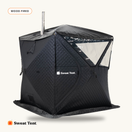
Sweat Tent Portable Outdoor Sauna
$1,499
$2,199
White Birch Firewood (1 Box)
Sweat Tent Portable Outdoor Sauna